Saturday, June 30, 2012

Creative Resources on the iPad!


If you have an iPad, do check out the Martha Stewart Craft Studio iPad app. It is free till 7 July and is perfect for crafting special thank you notes for those you love.

It is a wonderful app! I'm really pleased with it. What do you think?

Wednesday, June 6, 2012

Custom Wedding Monograms :: from Wedding Chicks

While surfing on instagram the other day, I stumbled upon these free custom monograms. You can custom made your very own monogram for your wedding from their website. Go to this page and you can choose the monogram that you want, then key in your initials and you can even choose the color that you would like the font to be in.

Here are a couple that I made! 

Have fun with them! Oh and even if you are married, this might make a nice print for an anniversary card or present :)

Tuesday, April 10, 2012

Wedding Gift Idea :: Cheongsam Inspiration


:: Cheongsam-inspired earrings made for my friend ::

As you may know, I have been busy working on a couple of cheongsam inspired pieces of jewelry for the National Museum of Singapore. (see this post here.) This inspired me to create a gift for a friend who recently got married. For her tea ceremony, she had chosen a salmon pink cheongsam with red floral prints. She looked stunning and I thought it would be fun to make her earrings to match them or remind her of that day cos honestly, there aren't that many occasions to don a cheongsam.  

This is how you can do it too:

Step 1: Obtain photos of the printed dress - I downloaded photos from my friend's Facebook account

Step 2: Print out the photos - I did this on my laser printer

Step 3: Glue on the glass pebbles and leave it to dry. I let it dry overnight.

Step 4: Cut around the glass pebble and then simply adhere to the earring backing.

And that's it! You have made a meaningful wedding gift that your friend will appreciate for the years to come. 


* The diy earring gift kit can be found at the Gift Wrapsody store.

Friday, April 6, 2012

DIY :: Daisy Cone Pew Decoration

:: Daisy Cone Decorations ::

Weddings can be expensive affairs. By the time it comes to flower decorations, it can be a source of tension for the bride and groom. Particularly as grooms tend to regard flowers as a non-essential. Brides however, can't imagine a wedding without flowers.

Hence, I am truly excited about sharing this Daisy Cone DIY. Because I think it will provide a solution to the bride and groom who desires simple wedding aisle pizzaz without burning a hole in their pocket.


Daisies are a really affordable option and are extremely long lasting too.


Step 1: First, purchase your daisies. You can head to a wholesaler like Far East Flora or just purchase them from the wet market. 

Step 2: Remove the leaves on the stem by plucking them off by hand. 
This will remove any leaves that will compete with the flower for water. 

Step 3 : You can now transport the flowers to the venue

Step 4 : Insert the flowers into the paper cones (no water is necessary) and trim appropriately. I prefer to trim the stems so that only the flower heads can be seen.


Step 5: Using a spray, spray some water onto the flower and leave overnight. 


The wedding seen here was held at 2pm and the flowers were arranged the night before from 8pm till 10pm.
Hope you find this useful!

Monday, April 2, 2012

Wedding Inspiration :: Mis-Matched Flowers


The flowers of a wedding are a great way to allow your personality to show. I find that wedding floral arrangements in Singapore are often styled in a cookie-cutter fashion. This wedding that I found on etsy screams personality. The bride, Elsie Larson who also blogs at A Beautiful Mess is a designer and hence, it is not surprising that this handmade wedding is full of all things beautiful. 

But today, i wanted to highlight her flowers. Check out the use of pretty colorful feathers and I just love the way color is used in this wedding. After the last wedding that I helped decorate, I have been asked by two other lovely ladies to design their floral arrangements. One of these ladies is Amanda who takes dreamy photos and is talented designer. If you are looking for someone to design your wedding invite, you should check her out. Her site is called Amanda Makes and her work carries a whimsical flair to it. 

Her request for her bridesmaids floral bouquets is that they should not match. How fun is that! I can't wait to get started on styling the flowers for the wedding but in the meantime, I will be collecting inspiration and pinning them to my Pinterest boards. 

For more pictures of this gorgeous handmade wedding, you can see it here on etsy.


Saturday, March 31, 2012

Wedding Favours :: Yellow and Turquoise Paper Fasteners


:: Wedding Favours ::

I've been wanting to show you these happy, smile-worthy paper fasteners that were personalized by a bride and groom to thank their guests. 

Both the bride and groom are christian ministry workers and the bible certainly is a key part of their lives. So it wasn't surprising that they chose to include the bible reference to the bible passage that was preached at their wedding as a key part of the final design. To tie in with their gorgeous wedding colors, they chose designs in sunshine yellow and shades of blue.

I thought you might like to know how they managed to hand-make all these paper fasteners. They made 300 wedding favors for their guests in all. Sounds like a lot but the bride tells me she was surprised at how quick it was to make them.
 
This is how she did it:

First, the bride asked a couple of girlfriends to help her with gluing the glass pebbles onto the paper. It took 5-6 girlfriends less than an hour to glue on the 300 glass pebbles. 

Secondly, she organized for another group of friends to help her with cutting and sticking on the glass pebbles. Although she was apprehensive about asking, her friends turned out to be really happy to be involved in the wedding prep. So she arranged an afternoon where they met and quickly finished gluing them on. (Now they were meant to cut the glass pebbles out but being the ever-efficient bride, she had cut out all the glass pebbles with her groom-to-be one one morning.) Even the groom was surprised at how easy it was!

p/s Favour kits will be available from my shop from 1 May 2012. Check it out then!

Wednesday, March 28, 2012

Meaningful Wedding Mementos :: Invite Magnets

:: Sweet Memento Magnets made by a Bride ::

Unsure what to do with your leftover invitation cards or programs? This bride made a set of lovely magnets. What a lovely idea! I need to go search for my old invites! I still have them stored away somewhere. Awful, isn't it?

Thursday, March 1, 2012

DIY :: How To Make Rose Petals


Want to recreate your own rose petals for your wedding? These can be used as confetti or for decorating the wedding aisle or the tables. You can purchase rose petals from Far East Flora directly but if you want a specific color to match your wedding theme, then you will have to make them yourself. 

It isn't a difficult task though. My 6 year old son became quite efficient at removing the petals from the stalk after one lesson so I am sure you will be up to the task.


Step 1: Purchase flowers from a wholesale florist


Step 2: Lay out newspaper on the table. This makes clean up a breeze.


Step 3: Pluck the rose off the stem 


Step 4: Press down on the stem and pry it off the back of the rose. 


Step 5: Loosen the remaining roses and store them in a cool place until ready for use.


Here is a photo of me with the wedding decor helpers who were such quick and cheery workers. Notice the difference between the aisle without the flower petals and with. It is a simple diy that achieves a really complete look.


* I used 4 bunches of yellow roses and 4 bunches of white roses for the aisle pictured.

Thursday, February 23, 2012

Meaningful Weddings :: Yellow & Turquoise Theme

:: The Welcome Table ::

The wedding that I am sharing today is an extra special one. Not only because, the bride, Chew Chern is an extra special lady friend of mine but the groom is from my church community group. He is a real gentleman who is thoughtful and sensitive to the people around him.   I couldn't be happier for Chew Chern who truly deserves the best! 

When Chew Chern asked if I could help out with the wedding decor, I told her that I would have been offended if she didn't ask me. Okay, I was kidding but suffice to say, I was really excited to be involved. She had chosen yellow and blue as her wedding theme colors. Yellow certainly matched her cheery personality and Blue was Stuart's favorite color. She asked me to help decorate the pews and the welcome table so I focused on those two areas. 
  
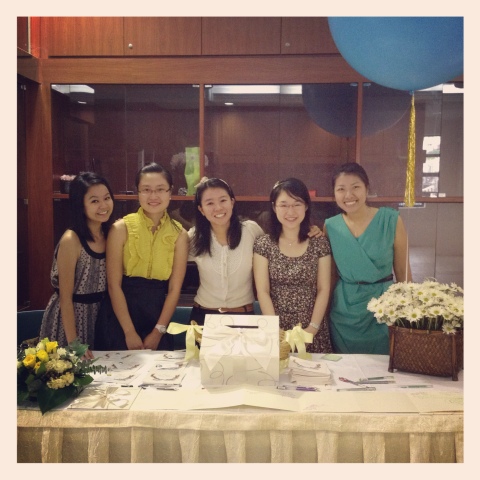
:: The Ladies at the Welcome Table ::

The angbao box and the guest book were purchased and I embellished them with a personalized pushpin. Sorry, I forgot to take a close up photo of that. Behind the angbao box is a basket simply tied with yellow ribbons where the wedding favors lay. (More on that in another post). I tied the ginormous blue balloon to the basket full of daisies and added gold streamers for that glittery effect. I must say I love it when helpers are dressed in matching colors!

Pew Decor :: Daisy Cones

For the pews, I decided to make daisy cones which were incredibly cost-effective. We reused the turquoise organza from another friend's wedding. and attached the daisy cones to the pews. 

Pew Decor :: Personalised Pushpins

We alternated this with yellow ribbons and pressed a personalized pushpin into each one for that extra special touch. 

:: Church Pew Decorations :: 

So there we go, a quick look at the decorations. Did you like it? To be honest, it all came together at the last moment. I had a really excellent team of helpers who were Chew Chern's friends and we put it all together the night before the wedding. I really loved the final effect, especially with the rose petals strewn down the aisle. 

If you wanna find out how to create your own rose petals, stay tuned for a diy coming up next.